
Real-time window scaling
The Realtime page on the left sidebar captures any window, upscales or sharpens it, optionally inserts interpolated frames, and shows the result as an overlay. The page is available only when the realtime overlay module is loaded.
Algorithms and models are listed under Real-time window models.
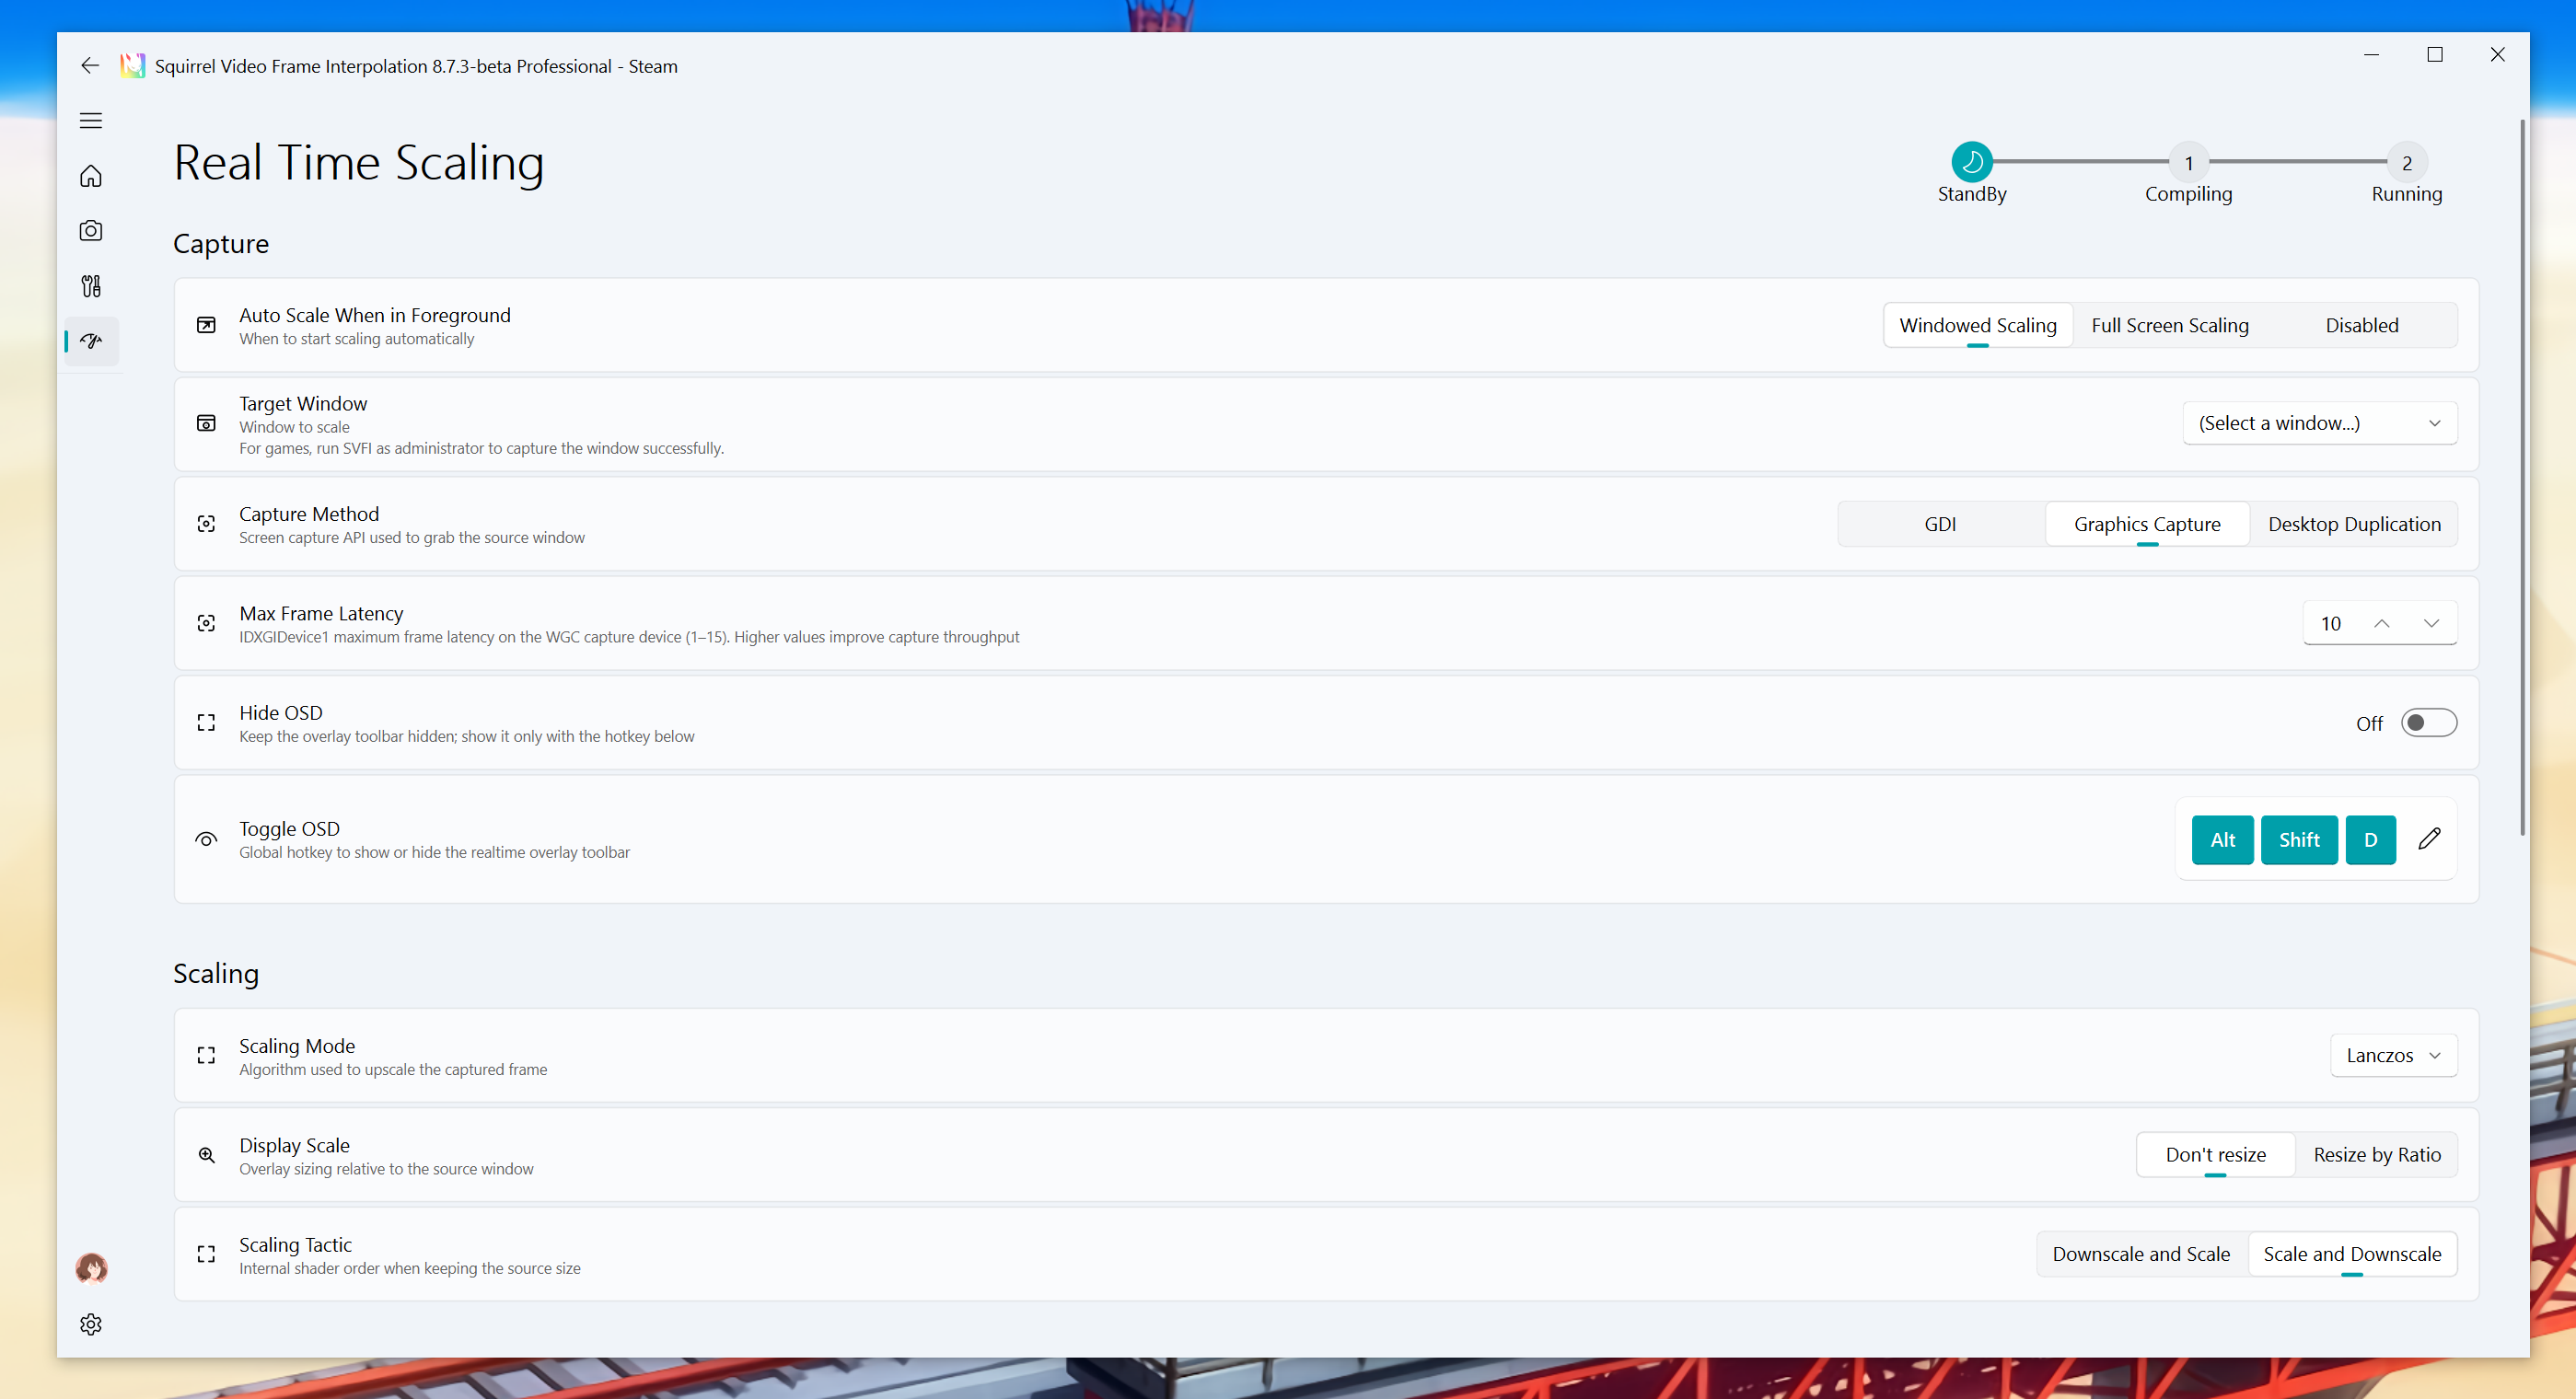
The header status goes StandBy → Compiling → Running. A long first-time TensorRT or OEM compile is normal.
Tips
To capture a game window, run SVFI as administrator, or capture may fail.
Tips
OEM models (DLSS / DLSS-NR, XeSS, FSR3 / FSR4, RTX Video, and frame-generation DLSSFG / XeSSFG) require the Professional DLC and are only available on the public beta branch. In Steam, open the app properties → Betas and opt in.
Capture
Target Window
Window to scale. After Auto Scale is enabled, bring that window to the foreground to start the overlay.
Capture Method
Screen capture API used to grab the source window:
- GDI
- Graphics Capture (default, Windows Graphics Capture)
- Desktop Duplication (does not support windowed scaling)
Max Frame Latency
IDXGIDevice1 maximum frame latency on the Graphics Capture device (1–15). Higher values usually improve capture throughput.
Auto Scale When in Foreground
When overlay starts automatically:
- Windowed Scaling
- Full Screen Scaling
- Disabled
Hide OSD / Toggle OSD
Keep the overlay toolbar hidden and show it only with the global hotkey. Default is Alt + Shift + D.
Scaling
Scaling Mode
Algorithm used to upscale or sharpen the captured frame. See Real-time window models.
ONNX reveals the inference backend (DirectML / TensorRT) and the super-resolution model list (models/sr/TensorRT/models).
CustomChain uses effects/CustomChain/*.json shader chains; you can add shaders under the effects folder.
Display Scale
Overlay sizing relative to the source window:
- Don't resize: overlay stays about 1.01× to cover the source; internal shaders can still upscale then downscale.
- Resize by Ratio: overlay grows by Initial Scale Factor.
Fullscreen targets always behave as Don't resize.
Scaling Tactic
Internal shader order when keeping the source size and the algorithm has a native scale factor:
- Downscale and Scale
- Scale and Downscale (default)
Initial Scale Factor
Windowed-mode scale factor applied at startup (about 1.01x–4x).
ONNX, RTX Video, DLSS / DLSS-NR, and similar modes expose extra quality controls; those are described on the models page.
Frame Generation
Shared Frame Guidance
Motion / depth guidance for FSR3/4 and XeSS: Auto, Zero, Motion only, Depth only.
Enable Frame Generation
Insert interpolated frames to raise output FPS. Then pick an algorithm, ratio, and (for RIFE) a model. See Real-time window models.
VFI Ratio
Output FPS ≈ capture FPS × ratio.
Detect Capture FPS / Capture FPS
Auto-detect the source frame rate, or set capture FPS manually.
Performance
Graphics Card
GPU used for scaling and VFI inference. Prefer a dedicated GPU so the overlay stays smooth.
Disable DirectFlip
Try this if the scaled output flickers or glitches.
Use Motion Vectors / Use Estimated Depth
Feed motion vectors into DLSS-NR / OEM guidance, and Depth Anything estimated depth (off = zero depth).
Optical Flow Backend
Motion-vector source: NVOF or AMD OF. NVIDIA Optical Flow also has a quality preset.
Workflow
- Open Realtime in the left sidebar.
- Pick the target window, capture method, and auto-scale policy.
- Choose a scaling mode; use ONNX or a vendor OEM mode for neural SR.
- Optionally enable frame generation and set algorithm and ratio.
- Bring the target window to the foreground (with Auto Scale on) to start; status becomes Running.
- Use the OSD hotkey to show or hide the overlay toolbar.